
How to Restore an Old or Damaged Photo with AI
Scratches, creases, faded colors, worn-out black-and-white prints: here's how to bring your old photos back to life, without risking the original.
A damaged old family photo is often more than just a picture — it's a face you're afraid of forgetting, a moment you can never recreate. This guide walks through restoring an old photo with AI: what it can realistically improve, what it can't guarantee, and how to get a good result while keeping your original safe.
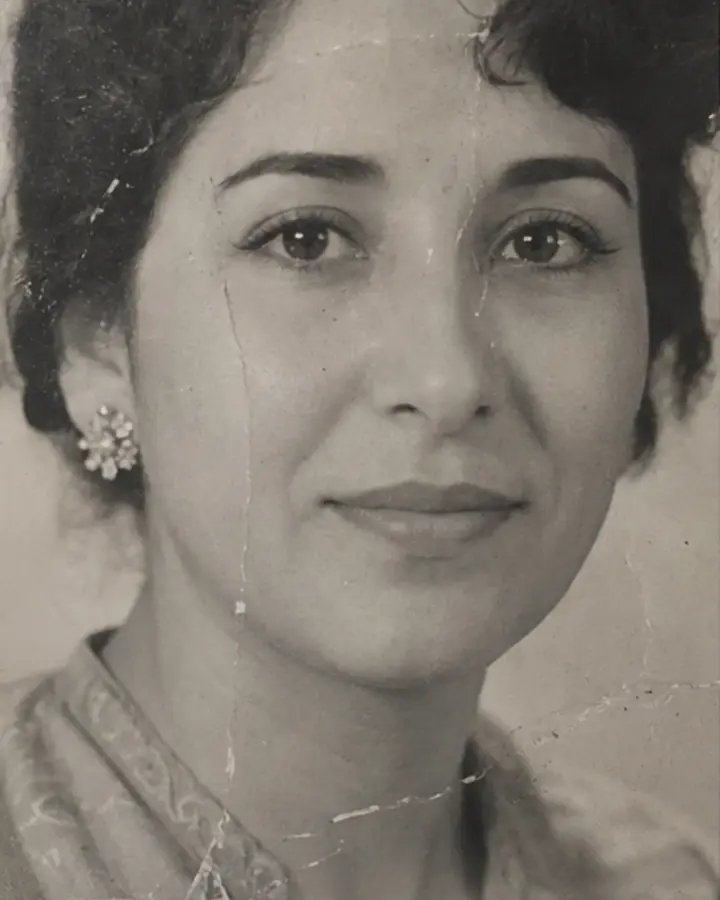
Understanding the damage on an old photo
Before restoring an old photo, it helps to know what you're dealing with. The most common issues on old prints are:
- scratches, usually from years of unprotected storage;
- creases and fold marks, common on photos kept in a wallet or a box;
- tears, sometimes partial, sometimes more severe;
- faded colors, when the original tones have shifted over time (yellowing, washed-out hues);
- low contrast, which makes the image look flat or dull;
- blur, often caused by the camera of the time or a missed focus;
- low resolution, typical of printed photos later scanned or photographed with a phone.
Each type of damage affects what a restoration — human or AI-based — can realistically fix.
Preparing the original photo the right way
How you prepare an old photo matters just as much as the tool you use.
- Avoid cleaning a fragile print aggressively (no solvents, no rubbing): you risk making the damage worse, permanently.
- If you have access to a scanner, use it instead of a phone photo — the result is sharper and truer to the original.
- For a standard photographic print, roughly 400–600 dpi is generally a useful starting range. Small prints, large enlargements, or archival work may benefit from a higher resolution.
- Keep an untouched digital copy of the photo exactly as it is, before any editing or restoration attempt. It becomes your untouched digital reference before any restoration.
If you're photographing the print with a smartphone instead of scanning it:
- shoot under even lighting, with no glare on the paper;
- keep the phone parallel to the photo to avoid distortion;
- make sure the shot is sharp before you use it.
What AI restoration can actually do
Once your photo is properly digitized, an AI restoration tool like Maleki AI's can:
- reduce certain visible flaws (light scratches, fading, moderate blur);
- improve overall sharpness;
- enhance faces and visible details for a clearer result;
- restore contrast, adding depth back to a dull-looking image;
- offer colorization if the photo is black and white.

The honest limits of AI photo restoration
A few realistic expectations to set before you start:
- On heavily damaged areas, the AI reconstructs or interprets missing information rather than recovering it exactly as it was — the result is a plausible estimate, not an identical reconstruction.
- AI-generated colorization is not historical proof: the colors it produces are an interpretation, not a verified fact.
- On a severely damaged or largely destroyed face, the generated result may differ from the original — the AI aims to keep a face recognizable, but can't assure that in every case, especially when a large part of the visual information is missing.
- If your photo has significant historical value, or is severely damaged (major tears, missing sections, badly deteriorated material), a professional photo conservation specialist remains the better option.
- Whatever result you get, keep your original file.
One important distinction: this guide is about visually restoring an image you already have (a scanned or photographed print, an existing digital file). It's not about data recovery. If a photo was deleted from your phone or computer, or the storage itself (memory card, hard drive) is physically damaged, that's a file recovery issue — a different topic that Maleki AI doesn't address.
Restoring a photo with Maleki AI, step by step
- Open the Photo Restoration section on the Maleki AI homepage.
- Upload the digital copy of your photo (the scanned or photographed version, not the physical print itself).
- Choose Color or Black & White depending on the look you want.
- You can also add the other version too — this is an optional paid add-on at the price shown on the site.
- Check the price shown before starting.
- Start the generation of your restored photo.
- Once the result is ready, visually compare it with your original digital copy. The slider shown on the homepage demonstrates an example restoration only — it isn't connected to your own result.
- Download and keep both versions — the original scan and the generated result — stored separately.
Your very first try is free (no credit card required) on photo restoration. Further generations are then billed per use, with the price shown before you confirm.
Color or Black & White: how to choose?
There's no single right answer, but a few things can help:
- If the original photo was color but has faded, the Color option usually gets you closer to how it originally looked.
- If the photo is naturally black and white, colorization is a creative interpretation: it can produce a vivid result, but it remains an estimate, not a historical truth.
- If the colorized version looks artificial in places (skin tones, clothing), the Black & White version often gives a more restrained result.
- When in doubt, the paid add-on lets you compare both versions before deciding which to keep.
Tips for a better result
- Start from a good-quality source: a clean scan beats a rushed photo of a photo.
- Make sure the framing is complete — avoid cropping out an important part of the image when scanning or photographing it.
- Avoid re-compressed images (a screenshot of an already-compressed file, a photo sent and re-downloaded multiple times): every extra compression loses detail the AI can't recover.
- If the colorization looks off, try the Black & White version.
- Compare the result to the original at normal viewing size, not just as a thumbnail, before treating it as final.
Preserving your photos after restoration
- Keep the original and the result in separate files, without overwriting one with the other.
- Use clear, descriptive filenames to distinguish the original scan from the restored version.
- Keep multiple backups (cloud storage, external drive) instead of a single copy.
- Don't replace your only original copy with the generated result, even if you prefer how it looks.
Looking for a polished, current photo instead — for LinkedIn or your resume? See our guide on turning a selfie into a professional AI headshot.
Privacy: what happens to your photo?
According to our privacy policy, the photo you upload is processed temporarily, solely to provide the requested service — it isn't kept by Maleki AI as a permanent gallery. A photo awaiting payment may be processed and held temporarily, for a few hours, as described in the policy. The generated result may then remain accessible for up to seven days, giving you time to download it. The providers needed to run the service are listed in the privacy policy. Your photos are not resold for commercial purposes.
For full details (exact retention periods, sub-processors, your rights), see our Privacy Policy.
FAQ — AI Photo Restoration
Can I restore a printed photo directly, without scanning it?
No — you need to digitize your photo first (scan or smartphone photo) before uploading it. Maleki AI works on a digital file, not the physical print.
Will restoration completely fix a badly damaged photo?
Not necessarily. AI can reduce many flaws, but a severely damaged photo may still show visible damage, or may benefit from a professional restorer’s input.
Are the colors added to a black-and-white photo the real original colors?
No. AI colorization is a plausible interpretation, not a recognition of the actual colors from the time — it shouldn't be treated as historical proof.
Will the face in the restored photo look identical to the original?
The AI aims to keep a recognizable face, but on a heavily damaged photo, a different result from the original is possible.
Can I compare my result with the original using the slider shown on the site?
That slider illustrates an example restoration on the homepage; it isn't linked to your own result. To compare, open both files — original and result — side by side.
Should I delete the original once restoration is done?
No. Keep your original digital copy, even after getting a result you're happy with.
Is it really free?
Your first try is free, no credit card required. Further generations are billed per use, price shown before you confirm.
Have an old photo you’d like to restore?
Try AI photo restoration on Maleki AI